
Have you seen those tepees they sell at Pottery Barn or Target? The ones that are over $100? Well, after looking at some pictures on Pinterest, I spent about $25 and made a tepee of my own.
Whaaaat?
I’m part of a book club that is reading Sally Clarkson’s The Lifegiving Home. One of her ideas from early on in the book is to give each child a “cozy space” where they can rest or read or just feel safe. I had first seen tepees a couple years ago and thought they were kind of silly. But the more I thought about it, the more I realized it would make a great reading “cozy space”.
This tepee came out really cute, and Noah loves it! Of course, I made some mistakes, but I learned from them so now I can share with you how to make one of your own (hopefully with fewer mistakes).
For the poles, I got four of the long, thick dowels from the lumber yard. They were exactly 3 inches in diameter. Then I got 3 meters (just a little more than 3 yards) of fabric from Ikea. Then one of my measuring errors made me need to make the fourth wall from a different fabric. I used approximately half of a king-sized flat sheet. You could totally make this from two flat sheets from a thrift store. Then all you need is some rope and a measuring tape.
First, I tied my poles together in the way I wanted them to be, then spread them so they were equally far apart. I did 48″, which is just about right for Noah, some toys or books, and maybe me. Then I measured at the top, and came up with 6″. That was my first mistake. I would have done it maybe only 2 or 3 inches, because it’s really gathered at the top and then there’s a bunch of extra fabric towards the top. Do better than me. Clearly, geometry is not my strong point. Then measure the length of your poles from just below where you tied the rope. This is the hypotenuse. Remember that it is the slanted side of the triangle and is longer than the center line. (Oops!) The fourth side (with the door) got an extra 2″ on the bottom so I could finish off the raw edges of the door. Here’s a diagram of what I mean.


For the pole casings, I added an extra 2 inches to each side (1/2″ for seam allowance, 1 1/2″ for casing) and it was the perfect size. To get even triangles, I folded my fabric in half for cutting. Then I graded the triangle from 26″ to 1 1/2″ at the top. Then there’s a 2″ rectangle stuck on the top for a casing. Here are the measurements I used and how it looks when I was cutting (or would have, if I had used the right measurements, doh!).

So lay out the fabric, folded in half, and measure. I had some classy fabric weights.

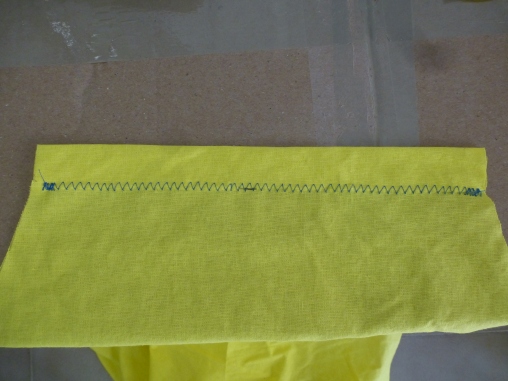
Then I sewed the 3 non-door sides, right sides together, with a 1/2″ seam allowance from the bottom to the bottom of the top casing rectangle.

Iron the seam flat, then with WRONG sides together, mark 1 1/2″ from the edge. Then sew on that line again from the bottom to the top casing. This is the casing for your poles.

Then take that top rectangle casing, fold it in half, top to bottom, and zig zag it. This is the casing for the rope to tie it to the top of the poles.
On the fourth side, the side with the door, cut a slit to the height you want the door to be. You can either fold the raw edges in and sew them or finish them with a single-fold bias tape type finish. Here’s how to do that. Cut the fabric an inch longer than the door slit and 2″ wide. Fold those skinny rectangles in half wrong sides together the long way and iron. Unfold, and fold one half in to the crease and iron. Repeat on the other side. Then unfold the whole thing, sew the right side 1/2″ from the inside of the door (It should be on a crease). Iron, then flip up, fold under and sew on the other side. Remember to reinforce the top of the slit so it doesn’t rip.

It was easier to do that before attaching that side to the other three. Otherwise, it’s so bulky! After you finish off the door, attach that fourth wall, using the same method as the other three. If you need to hem, do so. I didn’t because I used the selvage edges as my hem. I also sewed together the bottom of the pole casings so it didn’t slide around, but it’s probably not necessary.
Put it on the poles, slowly, a little at a time, and then thread rope through the top casing. Tie, pull the poles apart and there you have it!


This is awesome. Great job! My SIL just recommended that Sally Clarkson book–now I’m even more intrigued to read it. ❤
LikeLiked by 1 person
Thanks! I had fun making it. The Sally Clarkson book is really interesting. She has a lot of really great ideas. I’ve really been enjoying meeting with other ladies to talk about it and share ideas. My friend and I even got to go to London in March to a small Sally Clarkson conference and meet her! She’s just as lovely in person as in her books.
LikeLiked by 1 person
Wow! Thats awesome! I read a book she coauthored called Desparate and really enjoyed it. 🙂
LikeLiked by 1 person
Oh yeah, she wrote it with Sarah Mae. I haven’t read it, but I read Sarah’s book about cleaning your house. It was so helpful!
LikeLiked by 1 person
Fabulous!!! I especially love the math doodles. 🙂 Noah is so lucky!
LikeLiked by 1 person
Thank you! I was going to just post a picture of my notes, but they were so messy and I got my math wrong. Seriously, you’d think I had never thought deeply about triangles before (I’ve taught math from 3rd grade to 8th grade).
LikeLiked by 1 person
Obviously it helped though (the teaching!). 🙂
LikeLiked by 1 person